Internode FTTC NBN on Mikrotik
20/04/20 20:07 Filed in: Internet
Introduction
Having a shiny new Internode FTTC NBN service I am writing a quick series of articles covering how to configure a number of routers that are missing from the Internode guides.
One other reason for writing this set of articles is that it is really helpful to KNOW that someone else got a particular piece of hardware to work as there are a number of not terribly obvious from the package features that are required. For anything at all to work:
- PPPoE must work over VLAN ID 2 - otherwise you are going to have to put a smart switch in to tag and untag the traffic between the router and the NBN Connection Box (NBC)
- PPPoE daemon must be IPv6 capable
- DHCPv6 daemon must support Prefix Delegation - and not all of them work1
The general instructions from Internode are:
- VLAN ID 2
- PPPoE over VLAN ID 2
- DHCPv6 to get a dynamic IPv6 Address and a statically allocated /56 subnet
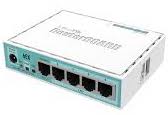
Today's configuration is a MikroTik Routerboard hEX RB750Gr3.

This article will cover setting up via the Web GUI on the RouterBoard: WebFig. There are at least 2 other configuration approaches which tend to be preferred by MikroTik aficionados - but both of those can be derived fairly easily from a WebFig configuration.
And it was pretty easy.
1. Currently the Ubiquiti Unifi Dream Machine (UDM) does not support IPv6 from Internode out of the box - a future release is expected to rectify this.
Prerequisites
Make sure you have updated your RouterOS. Recent versions work. This set of instructions was based on RouterOS v6.46.5 (stable). And then enable the IPv6 package.
- To update RouterOS goto Quick Set > Check For Updates
- To enable the IPv6 package goto WebFig > System > Packages and Enable the IPv6 Package
Creating VLAN 2
You need to create a 802.1q VLAN on Ethernet 1.
- Interfaces > VLAN > Add New
- Name: vlan2
- VLAN ID: 2
- Interface: ether1
Create a PPPoE Connection
A PPPoE client must be created with you login credentials on the VLAN with id 2.
- PPP > Add New > PPPoE Client
- Name: pppoe-out1
- User: yourusername@internode.on.net
- Password: yousecretpassword
- Interfaces: vlan2
Create a DHCP Client on the PPPoE interface
- IPv6 > DHCP Client
- Interface: PPPoE-out1
- Pool name: internodestatic
- Request: tick prefix, clear address
- Prefix length: 56
Put IPv6 addresses on the bridge
- IPv6 > Addresses > Add New
- Address: ::/64
- From Pool: internodestatic
- Interface: bridge1
- Advertise: tick
Conclusion
And that was all it took to get a basic connection up and running including a /64 from the /56
